
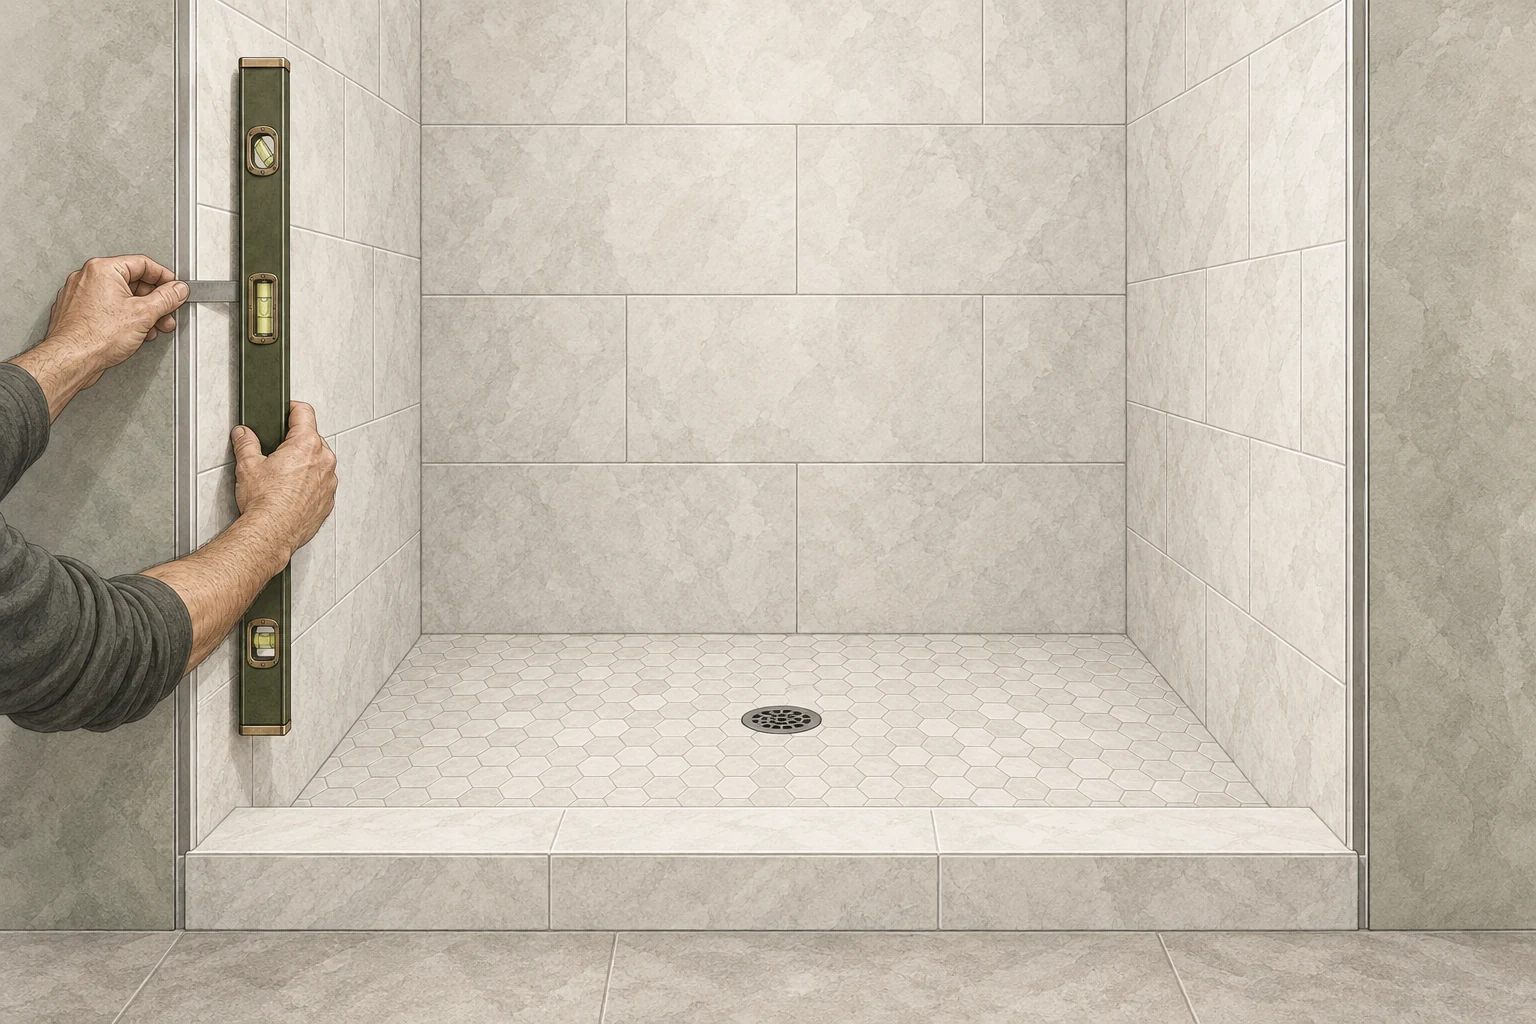
To check whether a shower wall is plumb, place a verified level vertically on the finished wall where the door jamb, hinge, or channel will mount. Center the bubble, measure gaps at the bottom, middle, and top, and record the lean direction. Repeat on the other wall. A selected door fits only when both walls stay within its published adjustment method and limit.
Here’s the quick version:
- Finish and clean the surfaces where the door will mount.
- Verify your level, laser, or plumb line.
- Establish a vertical reference at the actual hardware location.
- Record the bottom, middle, and top gaps on each wall.
- Record wall bow and tile lippage before deciding whether the door can adjust to the finished surface.
This method covers straight finished openings. Angled, curved, steam, knee-wall, and multi-panel systems require a full multi-plane field measurement.
What Does “Plumb” Mean on a Shower Wall?
Plumb means vertically aligned with gravity. It doesn’t mean flat, level, or square, even though those words tend to get tossed into the same toolbox.
| Term | What it describes | Shower example |
|---|---|---|
| Plumb | Vertical alignment | A wall that doesn’t lean inward or outward |
| Level | Horizontal alignment | A curb that is level from left to right |
| Flat | Surface shape | A wall without a middle bow, hollow, or local bulge |
| Square | Angle between surfaces or reference lines | Two walls meeting at the required angle |
A wall can be plumb top to bottom yet bow in the middle. Opposing wall lean can also leave the opening width unchanged. Bathroom walls are surprisingly good at looking innocent until the glass shows up. Widths describe the opening; a separate vertical reference identifies which wall leans.
What You Need Before You Check the Walls
- A verified 4-foot or longer level
- A short ruler or feeler gauges for measuring gaps
- A steel tape measure, pencil, masking tape, and a record sheet
- Optional: a self-leveling line laser and tripod
- Optional: a plumb bob and non-stretch line
Tool placement matters. Take final fit measurements from permanent tile, stone, or wall panels. Framing and backer-board checks help during construction but don’t describe the surface the hardware will touch. For timing, see rough openings versus finished openings.
Clean old silicone and loose residue before starting. Don’t grind tile or alter waterproofing just to make a reading look better.
On a molded enclosure, a straight wall is only one check. Use the fiberglass shower door compatibility guide to check hidden support, rounded mounting surfaces, and the door design before ordering.
How to Check a Shower Wall for Plumb With a Level
A 4-foot level works well, provided the level isn’t the crooked thing in the room.
1. Verify the level
Place the level vertically on a reasonably flat surface and note the bubble. Rotate it 180 degrees end for end and return it to the same line. If the bubble changes its mind, use another level.
2. Mark the hardware mounting line
Check where the jamb, U-channel, hinges, or brackets will sit. A perfect reading six inches away won’t help hardware that lands on a raised tile edge. Mark three heights with masking tape, using the manual’s locations when provided. Otherwise, start about 6 inches above the curb to avoid its radius or slope, then add middle and top marks. Record the exact heights so the check can be repeated.
3. Set the level vertically
Hold the long edge vertical on one mounting line. Center the bubble without forcing the level against every tile; its edge is your reference.
4. Measure and record the gaps
Measure the gap at all three marks and record zero where the wall touches. Insert the ruler or feeler gauge perpendicular to the tile; an angled reading is too large. Note whether the top moves toward or away from the opening. “Looked pretty straight” may be comforting, but it isn’t a dimension.
5. Overlap the upper and lower checks
A 4-foot level won’t cover a typical door height. Move it upward, overlap part of the first check, and keep the same line. Conflicting readings can mean the level moved or the wall changes direction with height. That’s a twisted wall: it may lean toward the opening below and away above. Treat it like a bow.
Slide the level within the hardware footprint. A jumping bubble can reveal a raised tile edge or grout ridge. An unrelated high spot shouldn’t define the wall, but one under the hardware matters.
Record the location and height of lippage under the hardware. Even a small step can become a pivot point during tightening and twist a hinge plate or jamb. Then check the other wall.

Start above the curb radius, hold the gauge square, and check the hardware footprint.
How to Check Wall Plumb With a Laser Level
- Put the laser on a stable tripod outside the wet area.
- Check the vertical line by the method in the tool’s instructions. Leica, for example, describes comparing the projected line with a plumb reference before relying on it.
- Mark a fixed hardware mounting line on masking tape at the bottom, middle, and top.
- Project the vertical laser line onto the wall near those marks. Put a pencil dot where the beam crosses each measurement height.
- Measure horizontally from each dot to the hardware line. The differences show its movement relative to vertical. Don’t move the laser or tripod.
- Repeat on the other wall and record the direction of change.
Glossy tile may hand you a bonus laser line you didn’t ask for. Dim the room if needed and identify the direct beam. A 4-foot level can cross-check it but doesn’t certify the laser over the full height.

How to Check Wall Plumb With a Plumb Bob
A plumb bob is old-school, cheap, and gravity has excellent quality control. Secure it above the opening without damaging finishes or waterproofing. Once still, measure from the string to the wall at all three heights.
Keep the weight clear of the curb and wall. Skip this method without a solid support above the mounting line. Trim, a shower arm, or an attachment that creeps or sways won’t work; use a verified level instead.
How to Measure How Far a Shower Wall Is Out of Plumb
When the bottom and top readings come from the same fixed vertical reference and the same mounting line:
Total lean over the checked height = |top gap − bottom gap|
This formula describes straight lean only. An unexpected middle reading signals bow, lippage, a moved reference, or a recording error. A zero answer is not an all-clear; resolve the middle reading first.
For example, a bottom gap of 1/8 inch and a top gap of 3/8 inch produce 1/4 inch of total lean over the checked height. A door needs at least 1/4 inch of adjustment in the measured direction to fit that wall.
| Record | Bottom | Middle | Top | Total lean | Direction and notes |
|---|---|---|---|---|---|
| Left wall gap | ___ | ___ | ___ | ___ | Toward/away from opening; bow or tile bump |
| Right wall gap | ___ | ___ | ___ | ___ | Toward/away from opening; bow or tile bump |
| Finished opening width | ___ | ___ | ___ | — | Record measurement heights |
Add the door height, tool length, mounting-line location, surface condition, model, manual revision, date, and photo numbers. Keep raw readings; don’t average them or deduct glass clearances.
For the rest of the opening—height, threshold, clearance, and all widths—use our step-by-step shower-door measuring guide.
Straight Lean vs. Wall Bow
A straight lean changes at a steady rate. A bow curves or changes direction. The National Glass Association’s frameless shower enclosure manual treats them as different field conditions.
Some factory profiles can accommodate published amounts of straight lean. A glass professional may consider angled glass for a consistently straight wall. Neither approach corrects bow, bulges, or twist. Glass is not known for negotiating with a hump in the tile.
The hardware matters more than the marketing label. One frameless door may use a U-channel; another may mount directly to tile with little or no adjustment. The configuration drawing should show which side adjusts, where the hardware lands, and how much movement is available. Our frameless shower-door selection guide explains how common hardware layouts affect fit.

Read the gap pattern first, then check the adjustment range for the selected door.
How Much Out of Plumb Is Acceptable for a Shower Door?
There is no universal out-of-plumb allowance. Compare each wall’s shape and lean with the exact model instructions.
The Sterling 5400-series manual requires walls within 3/8 inch of plumb. The DreamLine Unidoor-X manual gives its Hinge Panel Glass and vertical U-channel a 1/4-inch maximum adjustment. Use the limit attached to your chosen hardware configuration.
The number may describe one wall, an opening-width difference, full-height lean, or profile travel. Match its measuring method; a limit borrowed from the model’s brand cousin still doesn’t count. If the documentation is unclear, get written confirmation before ordering, drilling, cutting a rail, or approving glass.
Real-World Job-Site Measurement Examples
Sam wrote this guide using measurement guidance provided by Ronni. The anonymized examples and readings below were drawn from feedback Ronni received from his customers, and Ronni reviewed the finished article for technical accuracy. Product limits were checked against the cited manuals.
Case 1: Straight lean worked with factory profile components
A Sterling 5400-series bypass door was checked over a 76-inch door height. The finished tile was flat and showed no bow.
| Measurement | Bottom | Middle | Top | Total lean |
|---|---|---|---|---|
| Left wall gap | 1/16″ | 1/8″ | 5/16″ | 1/4″ |
| Right wall gap | 0″ | 1/16″ | 1/8″ | 1/8″ |
| Finished width | 59-1/4″ | 59-3/16″ | 59-1/8″ | — |
The widths were taken 6, 38, and 74 inches above the curb. Both walls fell below this model’s 3/8-inch limit. The installer set the factory Wall Jambs plumb against the finished walls; the door ran smoothly and sealed evenly.
The field record called them filler strips, but Sterling lists Wall Jamb and Spacer, not a separate “filler strip.” Its manual doesn’t publish a separate mounting-slot range.
Case 2: Zero total lean hid a middle bow
The selected Unidoor-X used Hinge Panel Glass in a vertical U-channel. Left-wall gaps were 1/16 inch at the bottom, 3/8 inch in the middle, and 1/16 inch at the top. The total lean calculation said zero. The middle reading told the rest of the story.
The U-channel couldn’t seat continuously. Installation stopped, the unit was returned, and the customer chose a framed bypass door. Matching end readings had not proved the wall flat.
Case 3: Equal widths hid opposing wall lean
The opening measured a very reassuring 59-1/4 inches at 6, 38, and 74 inches above the curb. Meanwhile, each wall had 1/4 inch of lean in opposite directions.
Both readings reached, but didn’t exceed, the component’s 1/4-inch maximum. That left no margin for tile unevenness, measurement uncertainty, or installation variance. The customer arranged a professional check before ordering nonreturnable glass.

What to Do If a Shower Wall Is Not Plumb
| What you measured | Next step |
|---|---|
| Both walls and every required opening dimension are within the selected door’s limits | Save the readings and continue with the remaining fit checks |
| A straight lean exceeds the target door’s adjustment | Choose a model with enough factory profile adjustment or use custom-angled glass |
| Both walls lean in opposite directions while the widths appear equal | Judge each wall independently; equal opening widths do not prove fit |
| The mounting strip has bow, tile lippage, a bulge, or twist | Stop before ordering or drilling and have the surface assessed |
| The curb isn’t level side to side or drains the wrong way | Treat it as a separate curb problem; wall-jamb adjustment won’t correct it |
| Published limits are missing or conflict with the sales page | Do not buy that listing without written fit values; choose a documented model if the seller cannot provide them |
Angled glass can match consistent straight lean, not bow, bulges, or twist. Don’t stack unapproved shims or force a profile straight. Silicone is a sealant, not structural diplomacy, and tempered glass cannot be trimmed on site.
If the wall condition changes which door style makes sense, compare sliding and hinged shower doors before shortlisting another model.
Consider professional measurement around 1/4 inch of full-height lean, whenever the mounting strip bows or has lippage, or when hardware mounts directly to the wall. Some products allow less than 1/4 inch, so check before ordering.
Complex enclosures and nonreturnable custom glass also deserve a site check. Our custom shower-door guide covers the questions to settle before approving fabrication.
If you’re comparing the result with a nominal product size, use the model’s finished-opening range rather than the number on the box. Our 60-inch shower-door guide shows how that comparison works.
Common Plumb-Checking Mistakes
- Holding the level horizontally and calling the wall plumb
- Reading the bubble but never recording the gap
- Checking only one 4-foot section of a taller mounting line
- Measuring unfinished backer board and using it to approve final glass
- Recording only opening widths instead of checking each wall
- Missing a middle bow because the top and bottom match
- Borrowing a tolerance from another brand or model
- Ignoring lippage that falls inside the hardware footprint
- Forcing a jamb against a bad surface or trying to alter tempered glass
Frequently Asked Questions
Is a 4-foot level long enough for a shower wall?
Yes. Overlap the lower and upper checks, or use a longer straightedge or verified laser for full-height comparison.
Can I use a phone level app?
A phone app is fine for screening, not ordering. Its calibration, case, and short contact length can affect the reading. Confirm it with a verified level, laser, or plumb line.
Should I check plumb before or after tile?
Check during construction so problems can be corrected, then check the permanent finished surfaces again before selecting a door or approving glass. The second measurement is the one that describes the hardware mounting surface.
Does an out-of-plumb wall always require custom glass?
No. A standard door may fit if its manual provides enough adjustment for the measured condition. Straight lean and wall bow aren’t equivalent, so compare both the amount and shape of the deviation.
Are plumb and square the same thing?
No. Plumb means vertical; square describes the angle between surfaces. One can be correct while the other is not.
Copy the table and record both walls. A number, direction, or mounting condition outside the selected door’s published range makes that door a no-fit. Choose a model with enough adjustment or move to custom glass. Once the fit works, use the frameless shower-door installation guide for the installation sequence.
Sources to check
Use these with the exact product and room conditions behind your decision.
- National Glass Association frameless shower enclosure manualStraight out-of-plumb walls, bow or elbow conditions, field measurement reconciliation, and glass or hardware considerations. Accessed September 15, 2026.
- Sterling 5400-series installation guideModel-specific wall-plumb requirement and wall-jamb and spacer terminology. Accessed September 15, 2026.
- DreamLine Unidoor-X installation manualHinge Panel Glass, vertical U-channel, and model-specific maximum out-of-plumb adjustment. Accessed September 15, 2026.
- Leica Lino vertical-line accuracy checkMethod for checking a laser's vertical-line accuracy against a plumb reference. Accessed September 15, 2026.