
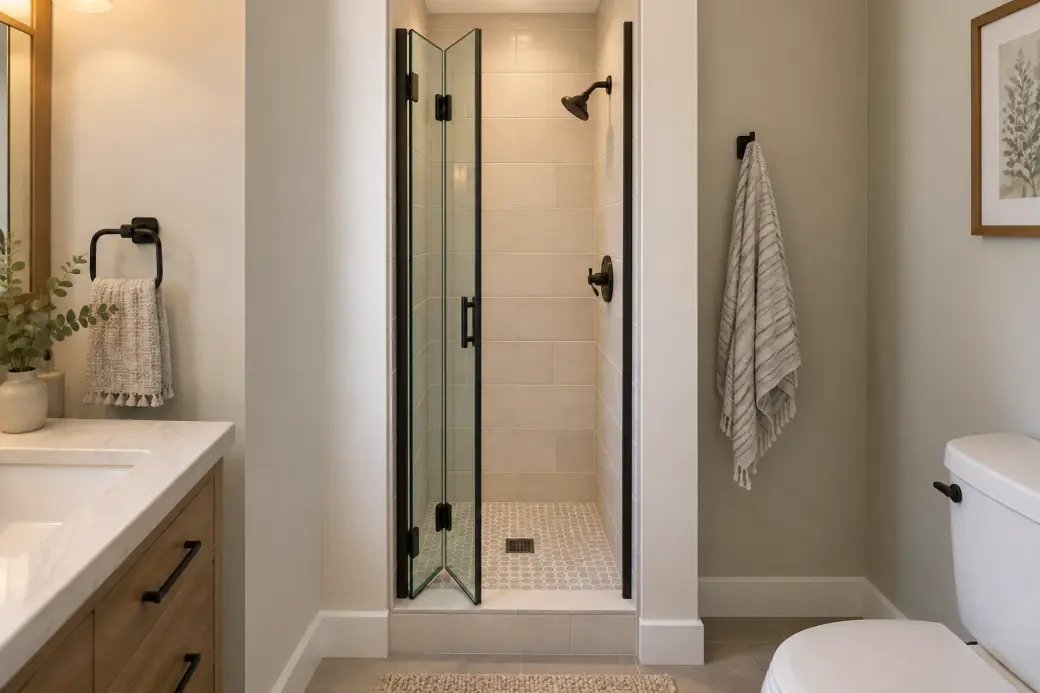
If a toilet or vanity blocks a conventional door swing, bifold shower doors are worth a look. Choose one when it fits the finished opening, folds without hitting anything, and leaves room to get through comfortably. Folding the glass changes where it goes, but it doesn’t make the glass disappear.
Bifold shower doors for small bathrooms: what are you buying?
Look at the wall connection, center fold and closing edge. Two doors can look alike when closed and move differently when opened. Those connections show you which one you’re buying.
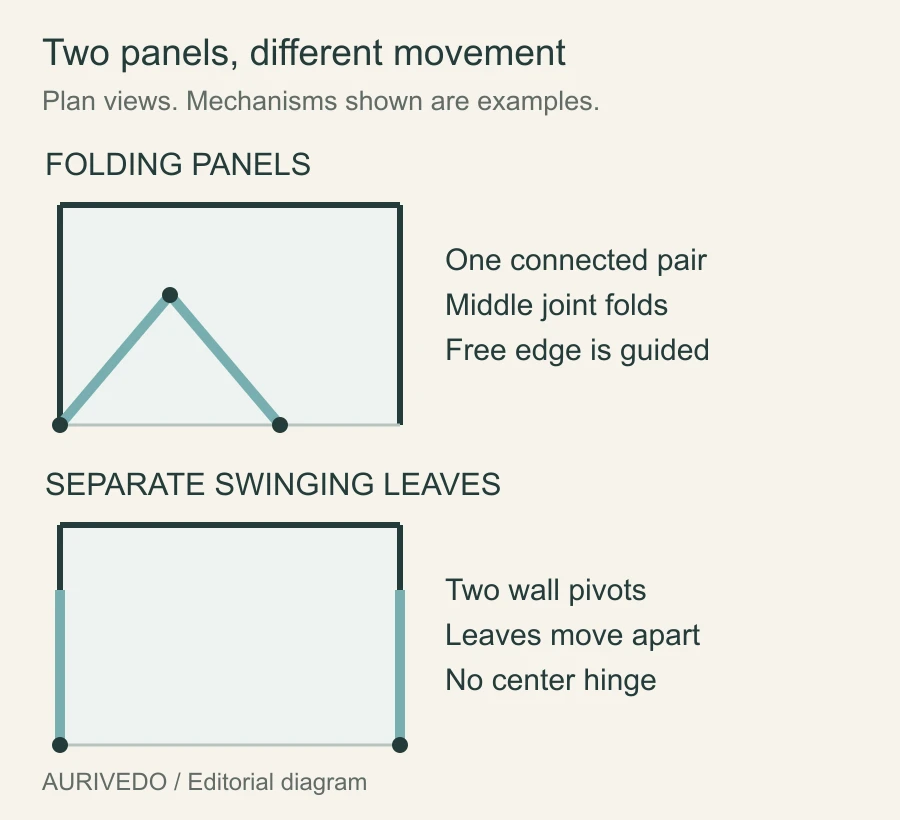
Two folding panels or two swinging leaves?
A bifold’s connected panels fold against each other. Some also pivot at the wall or guide the free edge along a track. Two separate swinging leaves usually meet in the middle and move independently. Two panes in a photo won’t tell you which setup you’re buying.
Watch a demonstration of the exact door, or get an operating drawing showing its hinges and guides. Follow the free edge as well as the center fold. “Reversible” or “left or right” means the hinges or pivots can mount on either side, viewed from outside. Inward or outward opening is a separate question.
Some bifolds mix tracks and hinges. The Butterfly-S manual, PDF pages 9 and 10 lists top and bottom guide rails, pivots and rollers. A system with rails has different support, movement and maintenance needs from one relying on wall hinges alone. Match your checks to the mechanism you’re buying.
A closing door or a folding shower screen?
A folding screen may leave part of the entrance uncovered. A closing door is meant to close the opening. DreamLine’s Aqua Fold description calls it a shower or tub screen even though the title says “door.” Settle that distinction before comparing prices, or the cheaper quote may buy a different job altogether.
Find the opposite closing jamb, the upright strip the door closes against, plus the center seal and bottom water-control parts. Then read the package list: door only, or base and wall panels too? A styled bathroom photo isn’t a packing list. Use the drawing and listed components for the setup being sold.
For a replacement, photograph both sides of the opening and identify the old model. Give the installer those photos, including existing holes and metal marks, to check the new mounting points and support. Old screw holes don’t establish whether the new door can mount there.
Bifold vs. pivot and sliding doors
Compare the actual movements, since a bifold can also pivot at the wall. Look at the path each door takes and the entrance it leaves. For cleaning, drips and the everyday trade-offs, compare sliding and hinged shower doors.
| Your room problem | What to compare |
|---|---|
| A vanity blocks a full swing | A folding path that clears both sides of the entrance |
| An interior shelf blocks the fold | A different hinge side or mechanism with a verified path |
| Sliding overlap leaves a narrow gap | The published access width of each actual configuration |
Will a bifold fit your finished opening?
Shop from the finished tile or wall panels. The size in a product title is a shopping label; the installation range tells you whether the door fits. Write the model number beside each measurement so the numbers stay attached to the right door.
Customer example: fit and finish. The customer who supplied these gold-door photos liked the appearance, quality and how the door worked. They said the dimensions matched the listing and the door did what they needed.
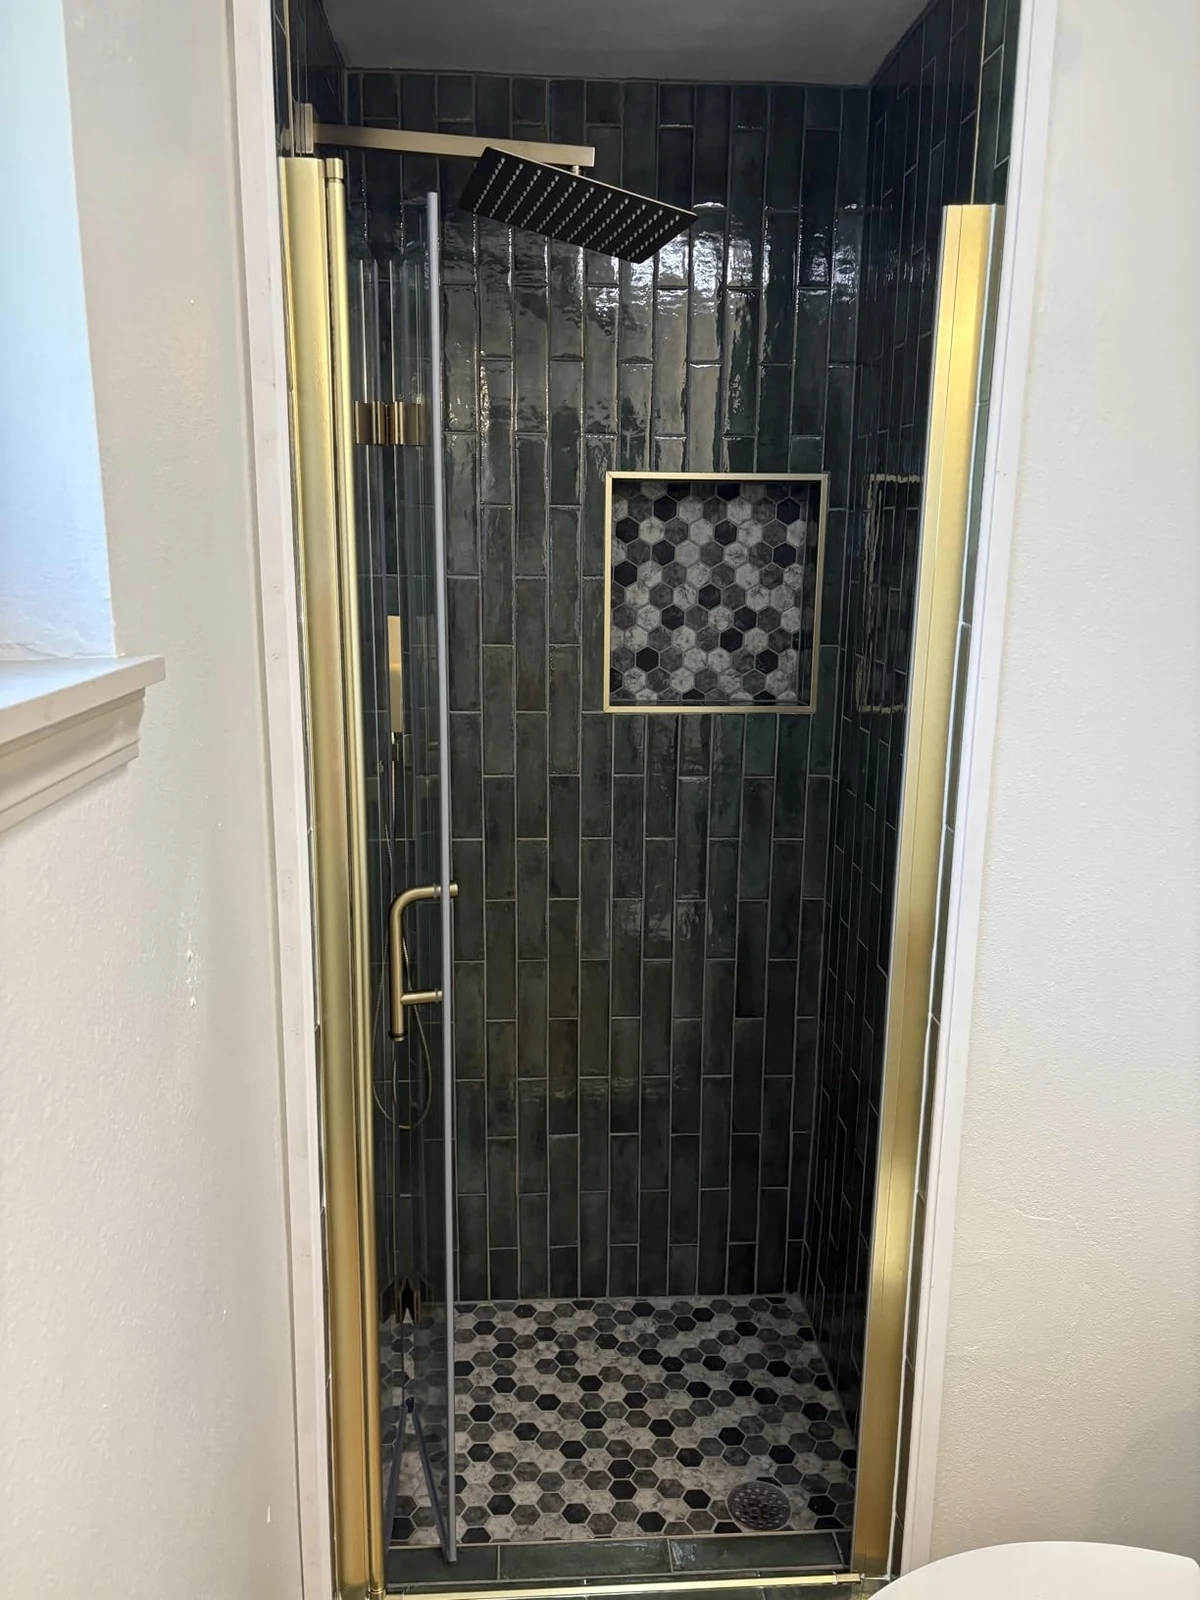 Folded open
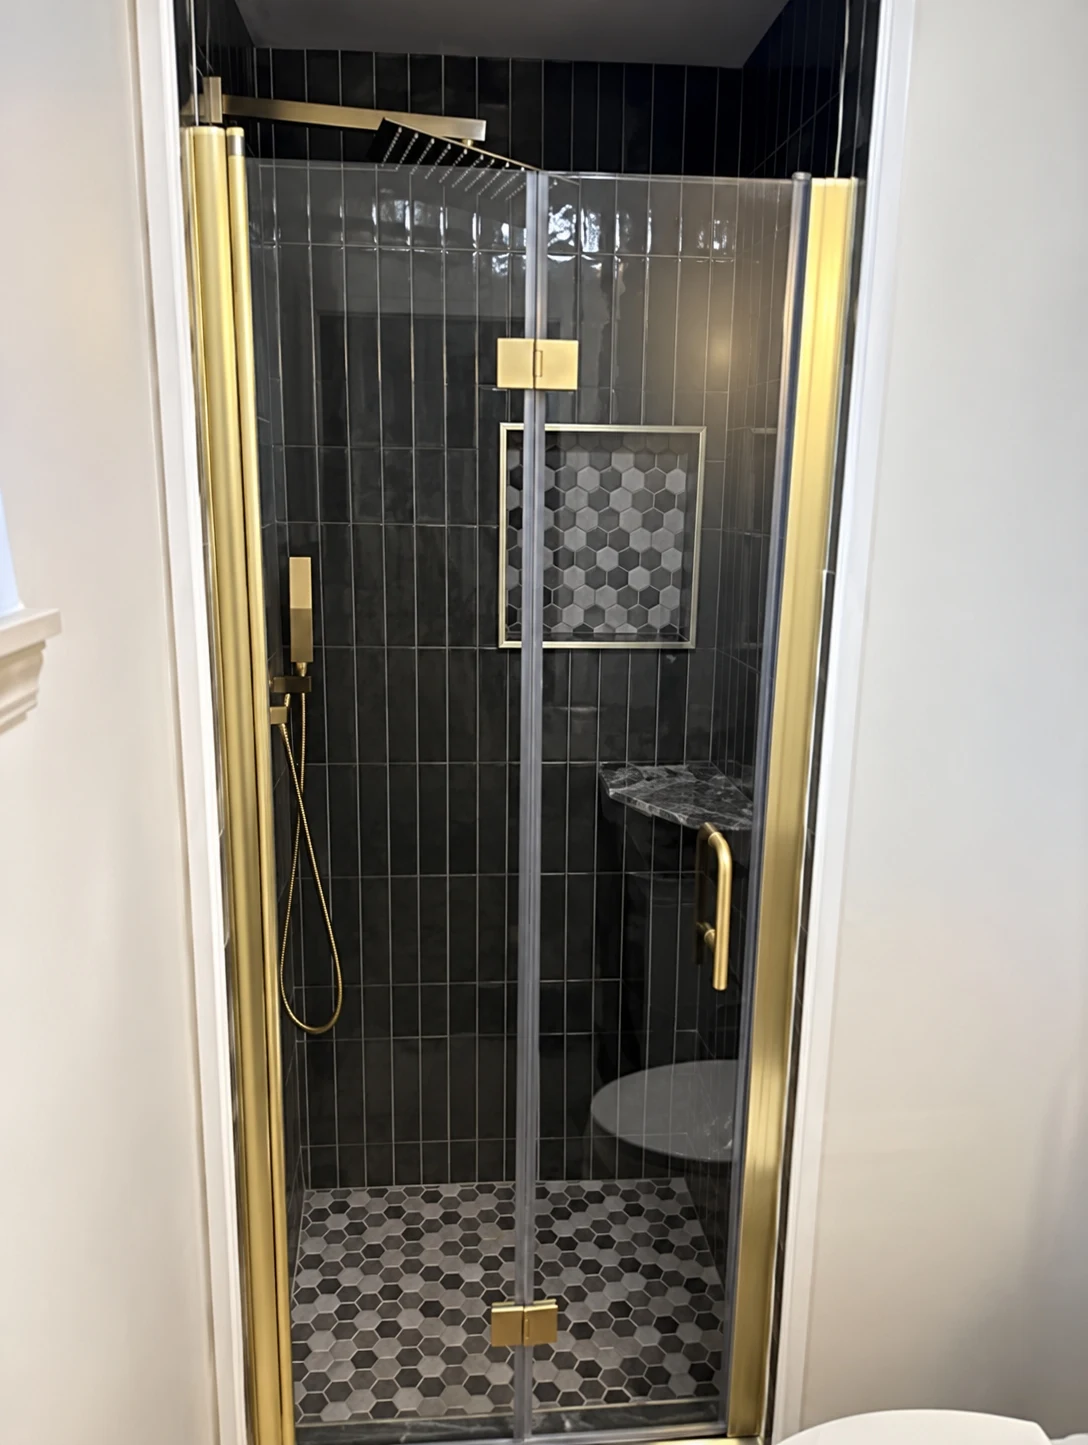 Closed
Keep the size label, fit range and entry separate
The DreamLine Butterfly-S SHDR-4536741 drawing gives a 34 to 35 1/2-inch model-width range and a 26-inch access width. Assembly height is 73 7/8 inches; access height is 72 3/8 inches. These labels matter: the assembly and the opening you walk through have different edges.
Keep those figures with this model. You can’t subtract the same amount from another door’s width, and adjustment doesn’t promise a wider entrance. Get the access width for the installation setting you plan to use.
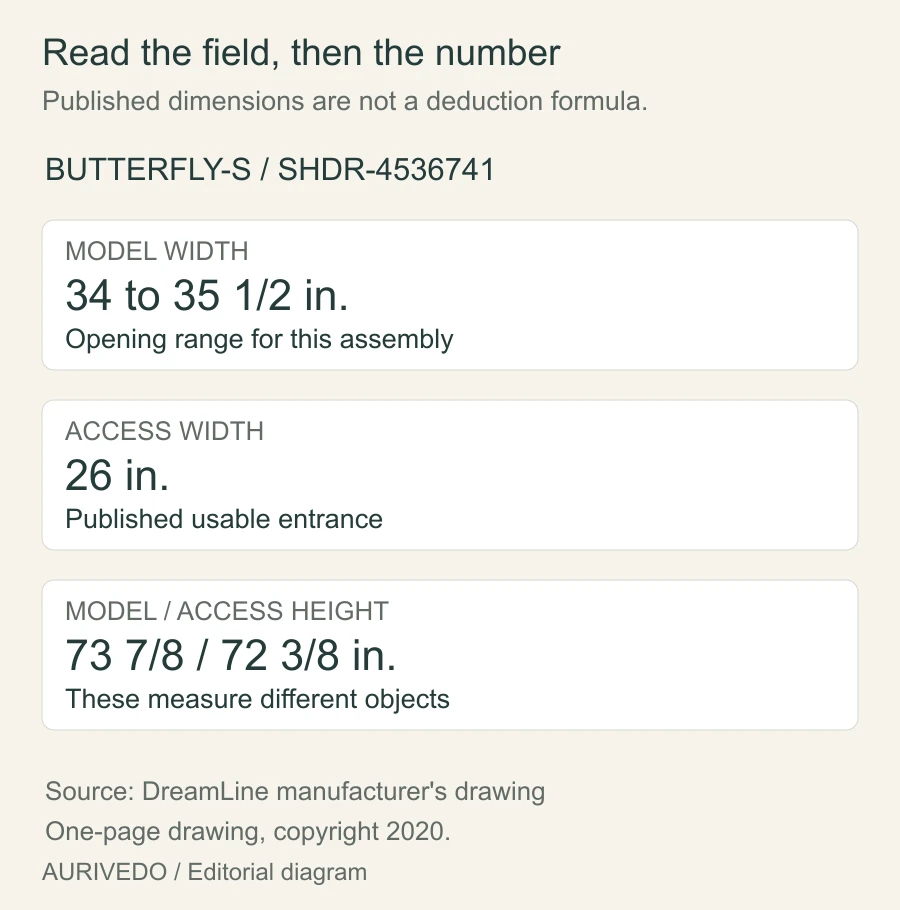
Use the S and full model number from the current Butterfly-S product page when checking documents. The older Butterfly name covers different products. The nominal size versus installation range guide explains those shopping labels.
Measure height from the supporting surface specified for that door. Include the room needed to install it beneath a header, ceiling or projecting fitting. Use the model’s requirement rather than adding a made-up clearance above the glass.
Check every width, the walls and the supporting surface
Measure the finished opening at the required top, middle and bottom positions. Write down what the tape says, even when the next size looks tempting. Then check the walls for plumb, meaning truly vertical. Keep the width readings and wall checks together.
Picture a wall that bows between three perfectly acceptable width readings. The mounting profile, the channel holding the assembly along the wall, still has to sit against that surface. Mark its mounting line on your sketch and have the installer check the bow there. Three good readings can’t describe every bulge.
If a required finished reading is 35 3/4 inches, reject the cited Butterfly-S size: its range ends at 35 1/2 inches. Wall adjustment is already accounted for in that range. When every width passes, move on to height, support and the folding path.
The Butterfly-S manual, PDF pages 5 and 6 covers adjustment within model size and requires at least 1 1/2 inches of flat threshold support, measured front to back. The threshold is the sill or curb under the door; this number isn’t its height. Check the usable flat seat, level and mounting conditions. Rounded edges can eat into that flat seat.
| Fit check | Keep the model | Reject or resolve |
|---|---|---|
| Finished widths | Every required reading fits its range | A reading falls outside |
| Wall condition | Its stated adjustment covers the measured condition | Adjustment is exceeded or misunderstood |
| Height and support | Required height, flat seat and mounting are established | A required surface or dimension is missing |
What to do when the listing and drawing disagree
The Sunny BFH30 page gives 29.5 to 31 inches in its adjustment table. Its linked BFH30 dimension image says 29 to 30 inches. A page update with an older drawing still attached could explain it, but the cause and correct range aren’t established here. Don’t pick whichever number happens to fit your shower.

Send the seller the SKU, your finished readings and both documents. Ask for a current matching drawing and installation range in writing. Keep measuring the room while that gets sorted; hold this model or compare one with consistent documents.
Folding shower doors for small bathrooms: check the whole movement
A bifold can stop the shower door and vanity from fighting over the same patch of floor. The folded stack still needs a home inside or beside the opening. Follow it from closed to open and back. Like a chair that fits under a table but won’t pull out, a door can fit when parked and get stuck on the way there.
Trace the fold before judging the parked panels
If there’s no operating drawing, request a video of the exact model opening and closing from inside and outside, including a view at valve height. Use it to understand the movement. Folding-path dimensions or a measured demonstration establish clearance. If the seller supplies neither, compare another model.
Find the hinge or pivot axis, the line the door rotates around. On your room sketch, follow both panel edges and the handle at floor, valve and shelf height. Think of a drawer whose front clears a cabinet while its pull catches: the shower handle needs its own room, too.
Imagine a shelf just behind the hinge wall. It may occupy the exact strip the folded panels need. Try the other hinge side if the door allows it, then check that entire path too. Leave room to stand and operate the door on whichever side you choose.
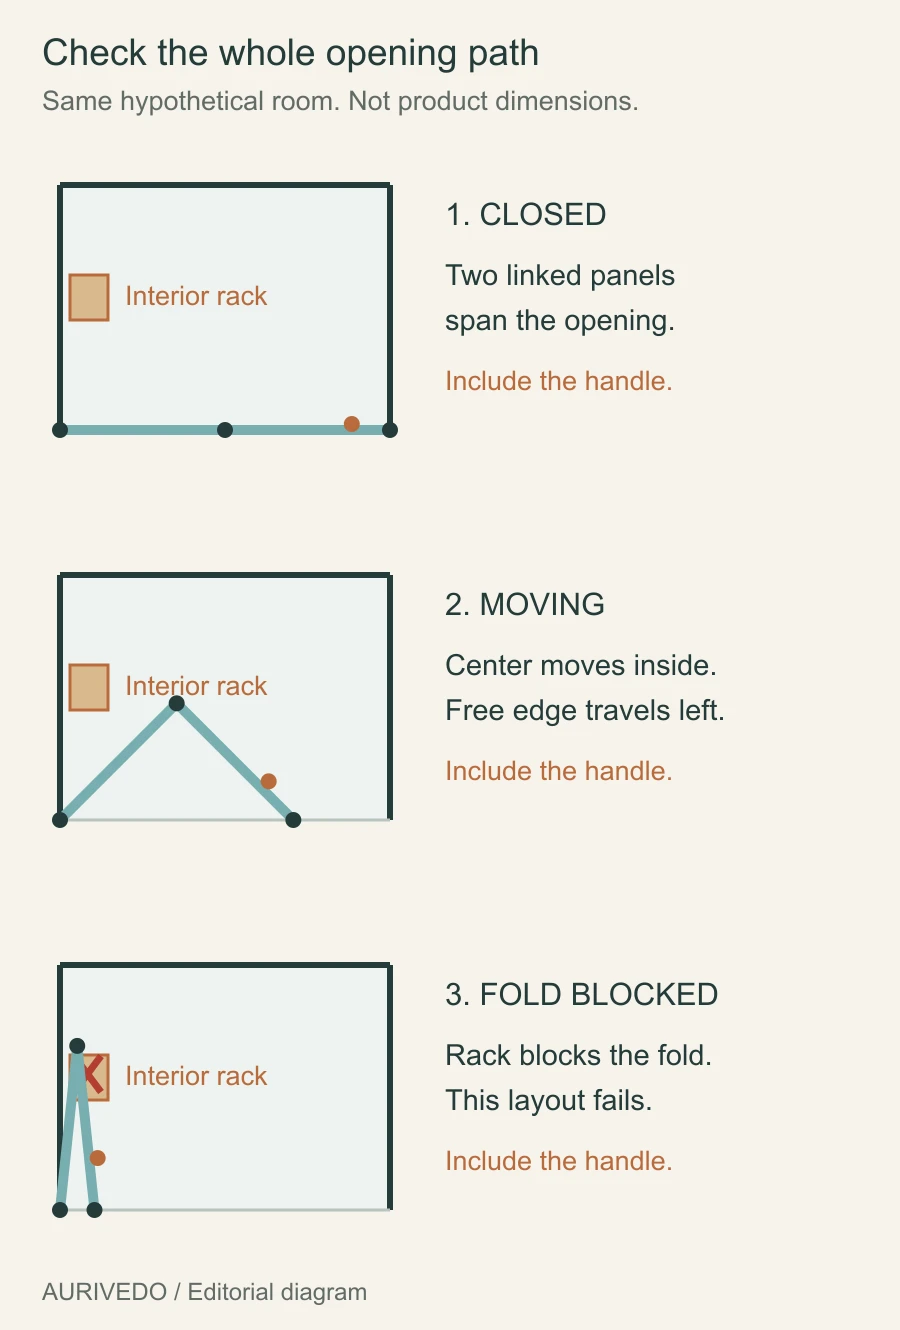
Put yourself in the sketch. You need to reach the handle and step back through the entrance; clearing the plumbing alone won’t do it. Imagine your morning routine: reach the control before stepping under the spray, then open the door to get out. If the stack occupies your standing spot, change the layout.
Try the exact door one-handed from both sides, including whether you can grip it comfortably with wet hands. Folding joints, seals and guides can add resistance. If the bathroom borders a bedroom, listen to ordinary opening and closing, too. Ask which sounds are expected. Investigate grinding, scraping or new stiffness instead of pushing harder.
If small children use the shower, check where the center fold could trap fingers. Watch the movement with hands clear of that joint, and use the handle to operate the door.
Keep an installed door within its stops. Check a proposed layout with the operating drawing, demonstration and measured sketch. The Butterfly-S troubleshooting page, PDF page 33, addresses handle contact with the opposite glass and stopper positioning. Include both in your space check.
A real internal-clearance example, with its limits
Basco Infinity 1433, manual page 3, needs clear space along the inside hinge wall equal to about half the opening width. Its example uses a 30-inch opening and 15 inches along that wall. Put a tape measure at the front hinge-side corner and point it toward the back of the shower. Picture a 12-inch ruler plus another 3 inches lying against the wall. That shows where the folded glass goes; it isn’t the entrance width.
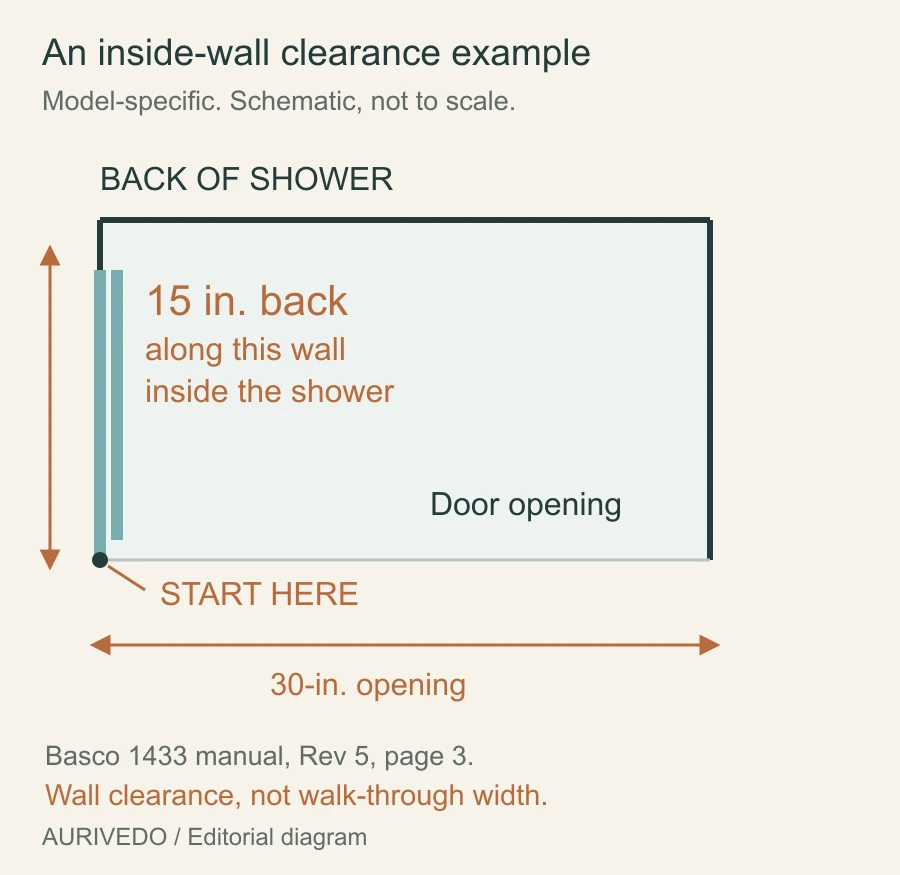
Look for soap racks, hooks, controls and steps along that wall. Basco’s example stays with Basco. The Butterfly-S drawing gives access width but no maximum inward folding projection. If your valve could be in the way, get that projection or a dimensioned operating layout. Door width alone can’t answer the collision question.
Rule out an inward-only hinged design if your project requires a hinged shower door to open outward. Check the exact folding mechanism and permitted direction against the rules adopted for your project before ordering.
If a household member may need help, establish how this door opens from outside when someone inside blocks the fold. Choose another layout if access for assistance can’t be established.
Choose a folding door by the entry it leaves
A door that fits the walls can still leave you turning sideways to get in. Judge the entrance with the panels in their everyday open position. Then consider how you’ll operate the door, wipe it down and keep its moving parts working.
Check clear entry in the opening state you will use
Measure the unobstructed gap beside the open door, starting at its outermost hardware. Use the model’s access or walk-through specification and check your project’s required clear entry. Wall-to-wall width, one pane’s width and a partly open photo each leave out part of that answer.
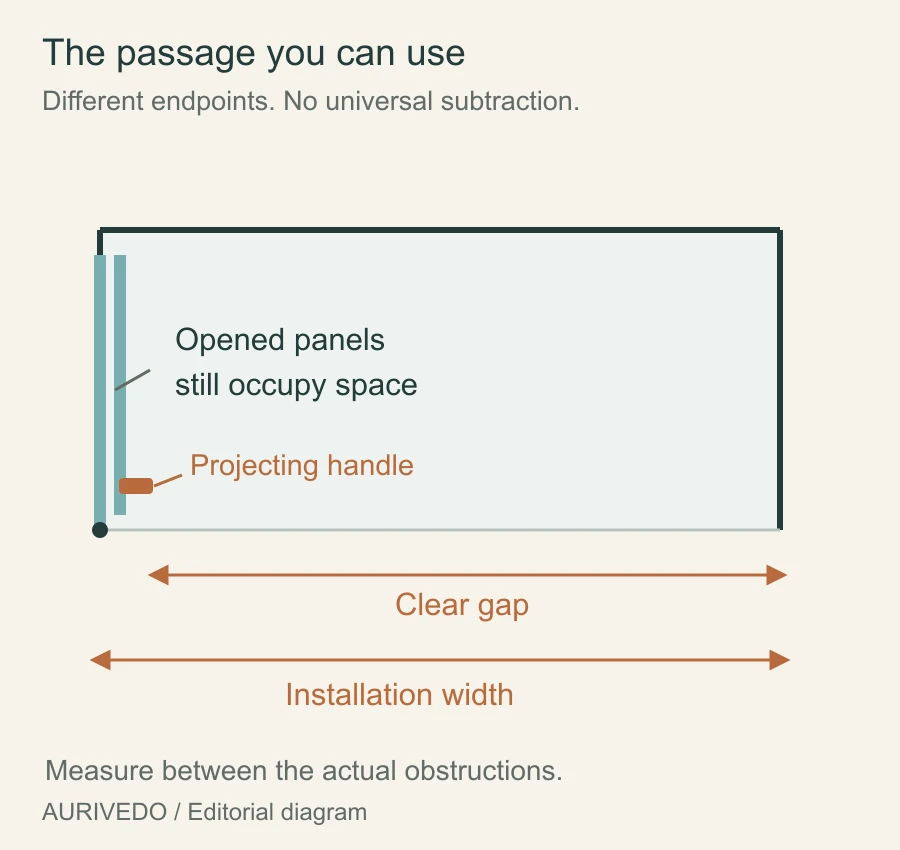
Tape that gap on a clear floor and use upright markers for the sides. Walk your usual route, including the reach for the control and towel. A few minutes with painter’s tape can tell you whether the proposed entrance feels cramped. This tests comfort; it doesn’t replace the required minimum. Mobility assistance calls for a full access layout, not an assumption that folding means accessible.
Keep the markers at the opening state you’ll actually use. If you have to move them to feel comfortable, compare a wider documented passage. A different handle or hinge side may change the movement without giving you more walk-through width.
Customer example: easier family entry. In photos and follow-up supplied through our commercial partner, a different customer confirmed that installation was complete, accepted and free of issues. They were very happy with the result: the larger opening made getting in and out easier for their family.
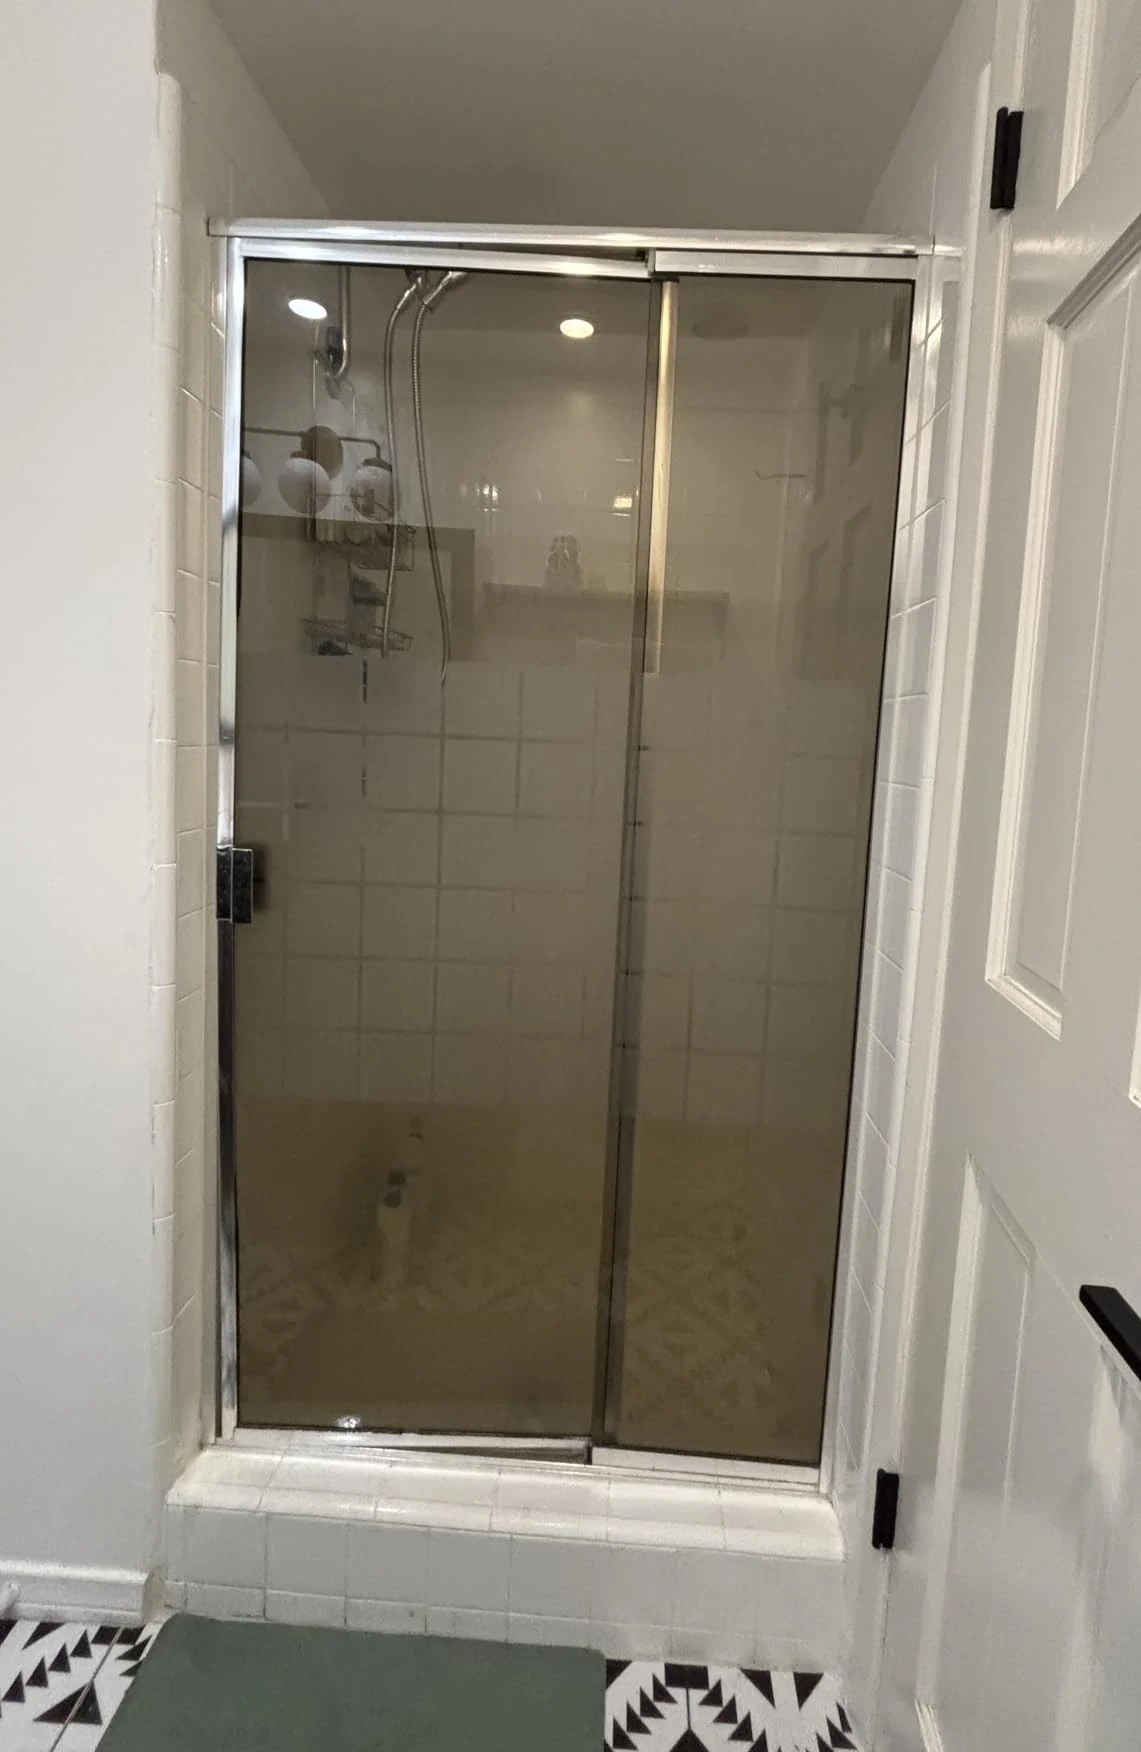 Silver frame
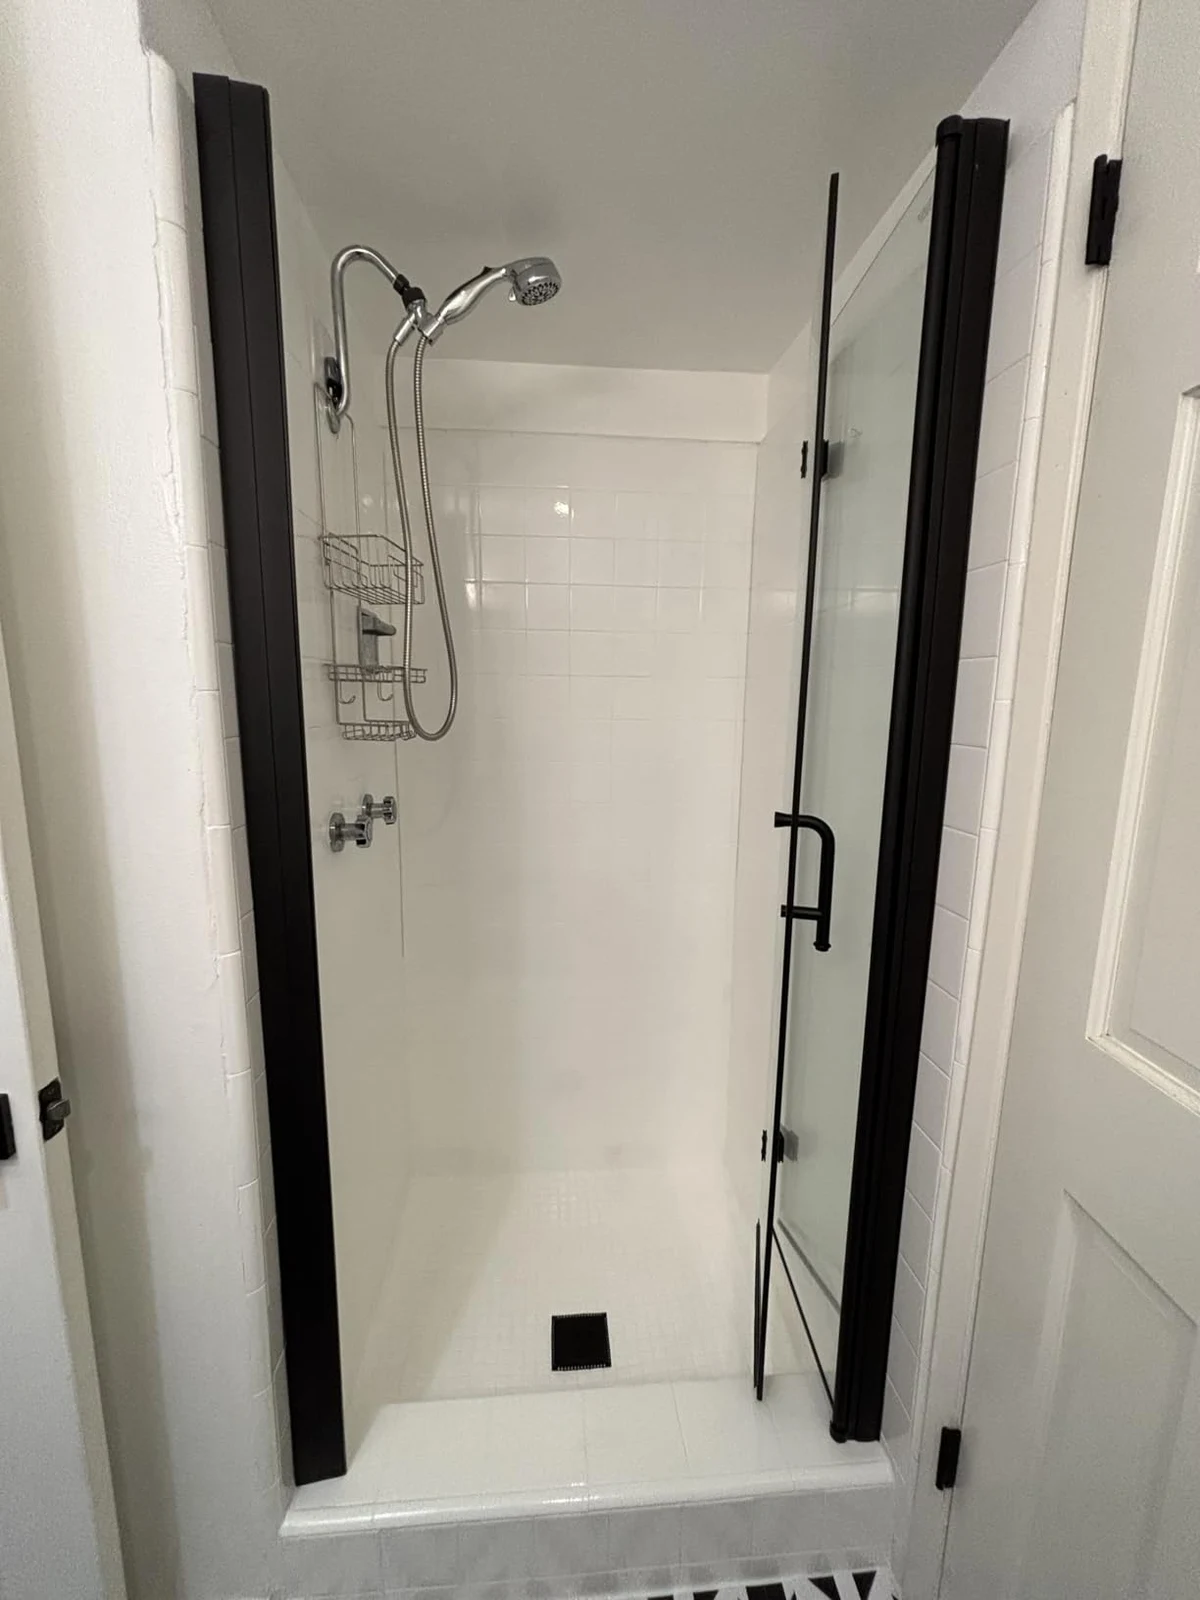 Folded open
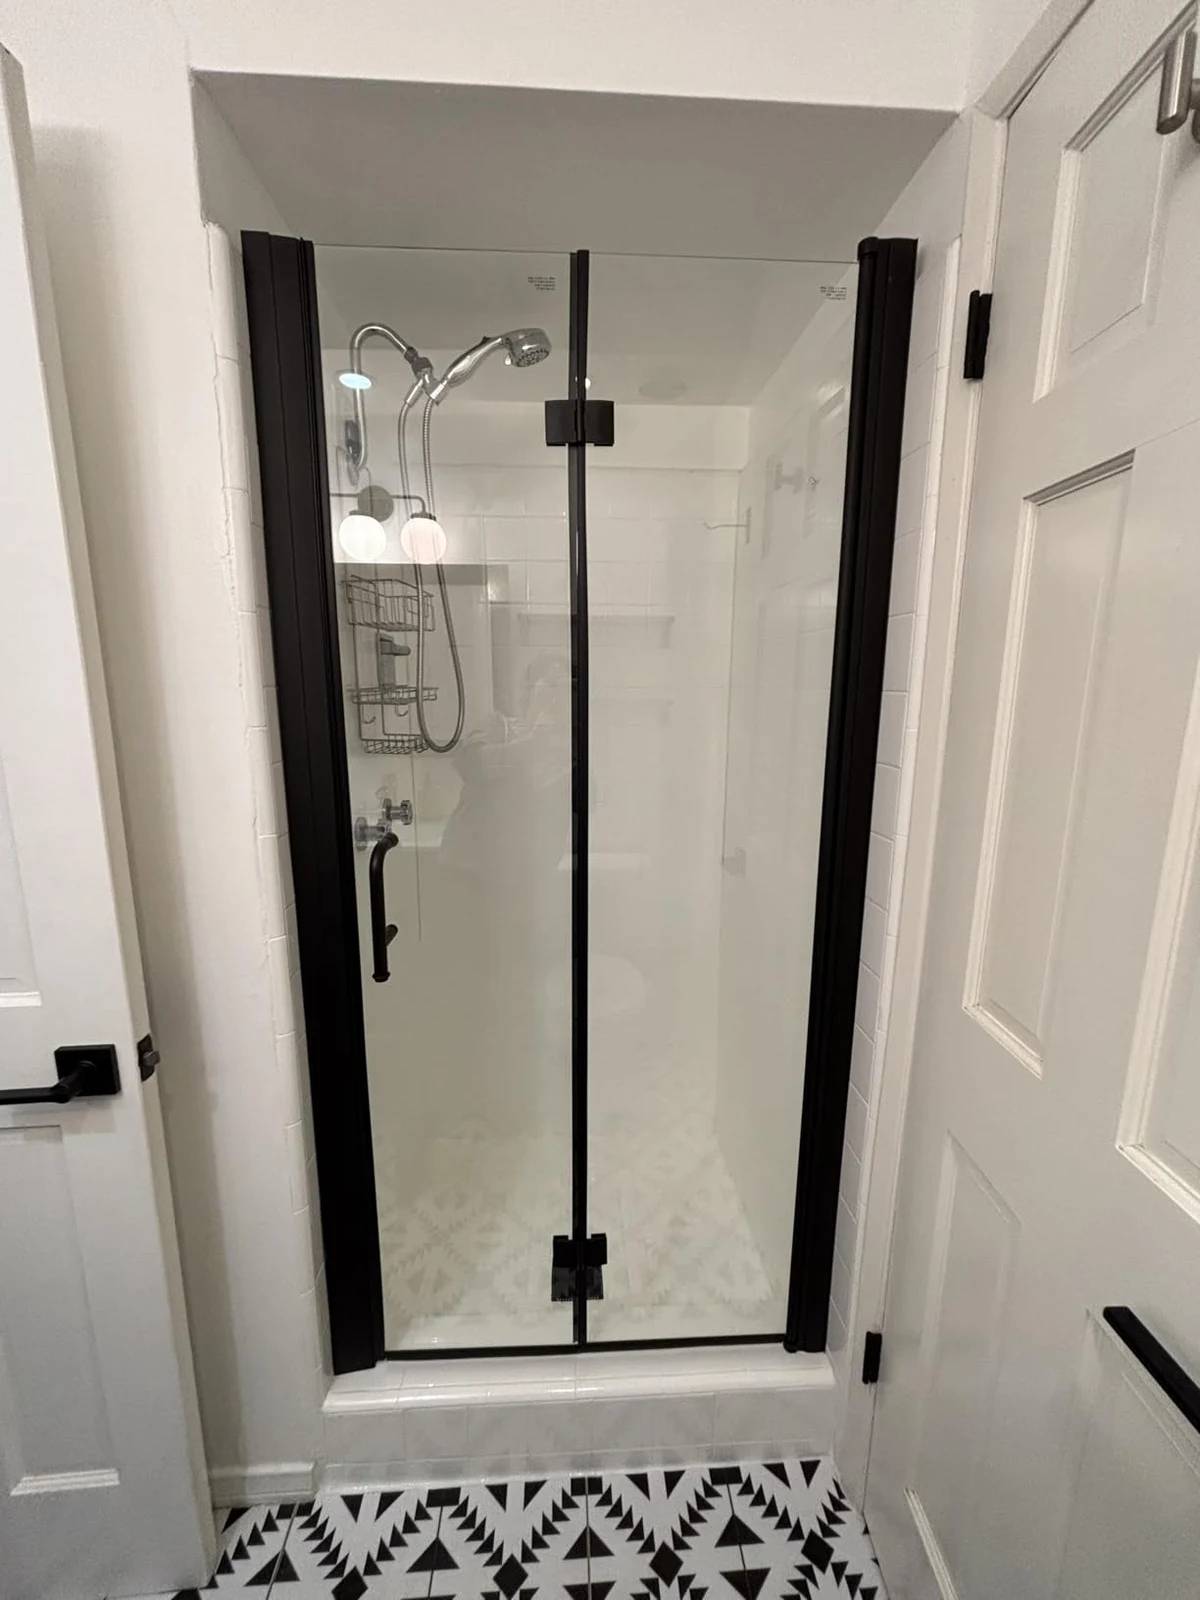 Closed
Live with the joints, seals and cleaning access
Match the center joint, closing edge and bottom seal to the spray direction and threshold. A closing door and a partial screen need different splash plans. Folding doesn’t guarantee water stays inside, and a door can’t correct a threshold that drains toward the room.
Make sure you can wipe both glass faces, center hinges and guides without taking the door apart. Use nonabrasive care compatible with its finish and coating. While cleaning, look for loose hardware, wear or panels falling out of line. Follow any inspection interval specified for the model.
Before buying, check that the hinge system is rated for your panel size and weight, with documented adjustment or replacement. If the fold later sags, rubs or stops lining up at the seals, follow the model’s instructions to find the cause.
Save the model, finish and parts list. Generic hinges may not fit the glass, guides or hole pattern; check that replacement seals, pivots and stops are available. Future you, holding a worn strip in one hand and a phone in the other, will appreciate an actual part number.
Price the complete closing assembly, required hardware, seals, delivery and installation. List optional bases and wall systems separately. A bargain door-only price can lose its charm once the missing parts reach the cart.
The order record and final fit decision
Keep your confirmed measurements and unanswered questions beside the room sketch. Before approving the order, have the seller identify the exact layout, opening side and included parts.
Ask the seller: “At my recorded finished widths, what clear walk-through does this exact assembly leave with its supplied handle and stops?” Save the answer with the order. “Wide entrance” sounds nice; a dimension lets you compare what arrives with what you agreed to buy.
File the agreed drawing and clarified dimensions with the order. Before installation, match the delivered SKU and parts to that record and resolve any mismatch. Save the packaging information with the manual.
| Record | Decision it supports |
|---|---|
| All finished readings, wall condition and threshold | Does this exact size and support arrangement fit? |
| SKU, document version, hinge side and closure | Are you comparing the configuration being supplied? |
| Full motion, handles and parked panels | Can it open and close past the room’s obstructions? |
| Clear entry at your installation setting | Can the intended users pass through comfortably? |
| Included door, hardware, seals and optional items | Does the quote cover the required package? |
Choose the bifold if it fits, clears the whole opening path and leaves a comfortable entrance. Reject a size outside its range or a layout that hits a fixture. If one missing dimension decides the fit, get it before ordering or pick another model. The door should make getting into the shower easier, without adding a sideways shuffle to your morning.
How can I tell whether a bifold shower door will fit my finished opening?
Match every required finished reading to the exact model’s installation range. Check wall adjustment, height and threshold support next, then the full movement and entrance. A width that fits gets the door onto your shortlist; the remaining checks decide whether to buy it.
Where do the panels and handle sit while the door folds and when it is fully open?
Follow the exact model’s operating path through to the fully open position, including the handle. The mechanism and hinge side determine where everything goes. Check shelves and controls inside the shower as well as the vanity and other fixtures outside.
What clear entry remains after a bifold shower door is installed?
Use the access width for your intended configuration. For example, the Butterfly-S SHDR-4536741 drawing lists 26 inches. Keep that number with that model; get the matching walk-through dimension for any other door you’re comparing.
When is a bifold shower door a better fit than a sliding or pivot door?
Choose it when it solves a blocked swing or an unsuitable sliding entrance and passes its own fit, folding-path and entry checks. If it hits a valve or shelf, change the configuration. Saving space in front of the shower only helps when there’s room for the fold elsewhere.
Sources to check
Use these with the exact product and room conditions behind your decision.
- Separate customer photographs and product feedbackTwo supplied photographs of the gold-finished door. This customer praised its appearance, quality and operation and reported that the dimensions matched the listing and suited their needs.
- Customer photographs and completion feedback supplied through a commercial partnerThree supplied photographs and current customer feedback: installation complete and accepted with no issues, customer very satisfied, and a larger opening making family entry easier.
- HOROW folding-door pinch-point guidanceManufacturer buying guide, checked October 28, 2026. Advises keeping fingers away from the folding joint and using the handle. Not a measured safe-gap specification.
- Relax folding-door assisted-access explanationManufacturer guide, checked October 28, 2026. Discusses blocked inward folds and model-specific outward-access systems. These features are not assumed for other bifolds.
- DreamLine Butterfly-S SHDR-4536741 manufacturer drawingOne-page drawing, copyright 2020: model width 34 to 35 1/2 in., model height 73 7/8 in., access width 26 in. and access height 72 3/8 in. Checked October 28, 2026.
- DreamLine Butterfly-S installation manualVer 1 Rev 2 032020, current model-linked document. PDF pp. 5–6 cover threshold and shared width/wall adjustment; pp. 32–35 cover care, handle/stops and model-specific parts.
- Basco 1433 installation guideQCI5332 Rev 5, July 14, 2025, PDF p. 3: inside hinge-wall clearance example. Its 30-inch opening/15-inch wall run is model-specific.
- Sunny BFH30 product page and linked dimension imageChecked October 28, 2026. Web range and linked image disagree; used as a document-conflict example, not a positive fit recommendation.
- DreamLine Aqua Fold official descriptionThe manufacturer describes this named product as a shower or tub screen; used to distinguish closure configurations.
- DreamLine Butterfly-S official model identityCurrent SHDR-4536741-01 identity, distinct from the older Butterfly family.